We love talking about how DivvyHQ makes work life better for busy content teams.
But words only go so far. To truly understand what Divvy is all about, you’ve got to experience it first-hand. That’s why we so strongly encourage content leaders who are trying to get a handle on their content operations to try out the 14-day DivvyHQ free trial.
How can you explore DivvyHQ to make sure it will deliver the future state you seek?
We have some ideas…
14 Ways in 14 Days: Tips for Getting the Most Out of Your DivvyHQ Free Trial
1. Watch the Getting Started Video
It’ll pop up on your dashboard once you log in for the first time. This quick five-minute video serves as an excellent primer for your Divvy debut, walking you through first steps like setting up a content calendar, adding a team member, and loading in your first content piece.
2. Get comfortable with your customizable DivvyHQ dashboard
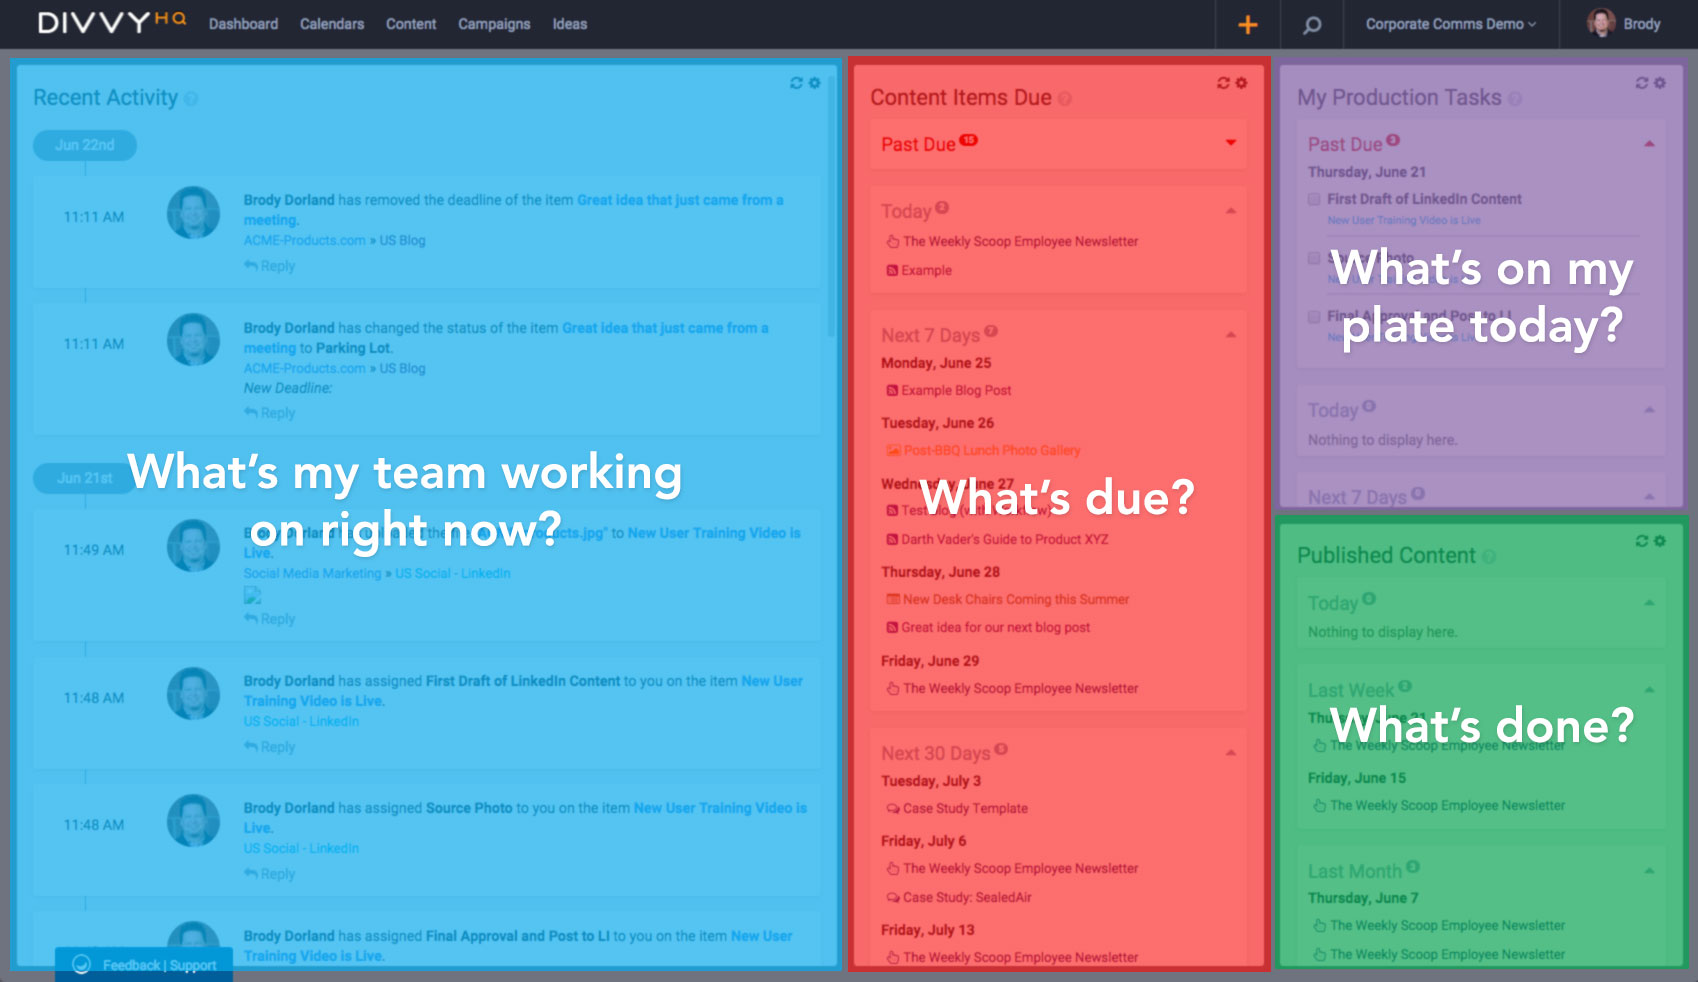
This will become your content command center. Gain familiarity with the layout so you’ll always know exactly where to look for recent activity, approaching deadlines, and assigned tasks. You can apply filters to any of these feeds by clicking the settings icon in the upper-right corner. Click here for a video tour of the DivvyHQ dashboard.
3. Create your first calendar
Now it’s time to start digging in. Content calendars are at the core of Divvy’s functionality so you’ll want to get one set up right off the bat. To do so, click on your name in the top-right corner of the dashboard and then select “Account Admin” from the menu. Here you’ll have access to a variety of tools and settings. Create a new calendar, choose a name (e.g. Blog Calendar or Email Calendar), default deadline time, and color scheme. Once you’ve generated one calendar you can add more to cover different channels or initiatives.
4. Add team members
DivvyHQ is all about enhancing collaboration. Bring some teammates into the fold so you can enjoy the platform’s simple efficiencies first-hand. Adding a team member can be done a few ways, but let’s just keep things simple to start by clicking the “+” icon in the top right and select Add New > Team Member. Fill out the pertinent info for them and specify their role/permissions. They’ll receive an email with instructions for quickly jumping in. Then, add another user. We recommend linking up every coworker who has heavy involvement in your content production process, so they can get acclimated with the environment.
5. Customize content type and strategy fields to align with your goals and objectives
Mold DivvyHQ to meet your team’s specific needs by configuring your list of content types for each calendar, making the process of future planning more structured and seamless. So for instance, you can create a list of content types for your blog calendar, based on format (text post, infographic, video, etc.) or objective category (thought leadership, lead gen, SEO visibility, etc.) or whatever matches up with the way you bucket your content items.
You’ll be able to include fields for strategic metadata such as target audiences, topical themes, buyer’s journey stages, SEO keywords and more. The rubber hits the road when customers tailor DivvyHQ to showcase their content strategy. It’s just simpler for teammates to do meaningful work when strategy, purpose and objectives stay front and center.
6. Create your first content item
Now that your calendar and team members are set up, it’s time for action. You’re gonna love how easy it is to add new content pieces into the workflow. To do so, click the big orange plus icon on the top nav bar (or, if you already have a due date in mind, you can hover over that day on your content calendar and click the +Content link to automatically set it as a deadline). This will pop up a form where you can enter basic details like title, summary, type, and owner. You can now either save it for later, add more details, or “Park It.”
7. Load up the Parking Lot
When you choose the “Park It” option, your content item will land in the Parking Lot. This is Divvy’s idea repository, where concepts and future assets can be stored and centrally accessed. Whether it’s a vague shell of a blog post premise, or a fully developed outline, you can place it here and ensure it won’t slip through the cracks. Encourage other team members to add their own ideas and build up your pipeline. If you currently house content ideas in a spreadsheet or Word doc, try importing them all here.
8. Fill out the first month on your content calendar
Time to get a feel for Divvy’s snappy drag-and-drop functionality. Go to your calendar page and click the blue list icon docked on the right side. This will bring up your Unscheduled Content panel, which includes a Parking Lot tab. You’ll see your list of ideas and concepts added in the last step right in front of you. Pluck one that you like and drag it over to the calendar, dropping it onto the desired date.
Presumably you’ve got your content planned out for the next few weeks; run it all through Divvy to see how the platform jibes with your existing workflow. Viewing your scheduled content in this way makes it easy to spot gaps or redundancies that you might otherwise overlook.
9. Go through the full process of publishing a post through DivvyHQ
 We’ve laid enough groundwork to actually create a blog post through the platform, so let’s give it a spin. One thing that differentiates Divvy from some other content management tools is the ability to actually execute, in addition to planning and communicating. You can enter your content directly through our built-in Content Editor, which offers a WYSIWYG interface that should feel familiar for most content creators.
If you already run your content through WordPress, try out our integration (Pro and Enterprise plans). By actually going through the full procedure of grabbing a content idea from the Parking Lot, placing it on the calendar, fleshing out details, adding the finishing touches and releasing it into the wild, all inside Divvy, your team will hopefully begin to see how Divvy simplifies content planning and collaboration.
10. Repurpose that blog post into something else
Repurposing content is a hallmark of content marketing today, and with good reason: it allows marketers to get maximum mileage out of all they create, while covering key topics from every angle for their audience. We wanted to make this practice as easy as possible on Divvy, so we included one-click duplication. To utilize it, open a drafted or published piece of content (maybe the blog post created in the last step) and click the “Duplicate” icon on the upper-right. Now you can start making adjustments to update or alter the post to provide a fresh spin.
11. Add a few reminders on your calendar
If you’d like to add a few things on your calendar during your DivvyHQ free trial that aren’t necessarily content related, our Reminders feature is perfect for that. Check out the video above to see how it’s done.
12. Ask for help or report an issue
We like to think we’ve ironed out most the bugs in our application, but if you run into any trouble, confusion, or you have an improvement idea, we encourage you to try out our feedback protocol. At any time while you’re in Divvy, you can click the blue “Feedback | Support” button at the bottom of the screen, which will allow you to take a screenshot and send it directly to our support team.
13. Let your project managers dive in
Among the folks who geek out most when they start playing around in Divvy are project managers, who tend to have an acute appreciation for the way it reduces time-wasting tedium when it comes to coordinating around tasks, initiatives, and campaigns. Urge your PM to isolate all content-related collaboration within DivvyHQ during the trial; they’ll likely be delighted with the number of manual emails and procedural status meetings are eliminated through the platform, freeing them up to focus on the real work.
14. Don’t forget about it!
We close with this most urgent imperative. However you end up using DivvyHQ during your trial, please do take full advantage of your complimentary time with it and see how it fits with each element of your content production workflow. Maybe you’ll determine it’s not the right fit for your organization, but the only way to find out is by fully immersing your content crew and embedding your processes within it during the test run.
If you try out these features and capabilities during your DivvyHQ free trial, you should gain a solid understanding of what the platform brings to the table.
So what are ya waiting for? Sign in to Divvy or sign up for your free 14-day trial and we’ll see you inside.